
How Does 3D Printing Prototyping Work? The Full Process from File to Delivery

Between sending a file and receiving a 3D printed prototype there are several steps that can be settled in advance. Making the process explicit means a first order is far less likely to go wrong. This article walks through it in three phases: before the order, during production, and after dispatch.
1. What to prepare before you start
- The drawing — STL, STEP or IGS are all fine; check that the export unit is millimetres and that the model is a closed solid.
- What the part is for — appearance only, assembly, or functional testing. This decides the process.
- Quantity and deadline — how many parts, and when they are needed.
- Finishing requirements — whether sanding, bead blasting, dyeing, painting or screen printing is needed.
- Service environment — indoor or outdoor, loaded or not, exposed to heat. These affect the material choice.
The more specific the brief, the more accurate the advice and the closer the quote sits to reality.
2. The full prototyping sequence
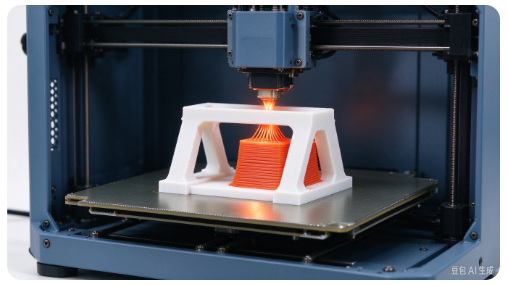
- Step 1, submit the files — send the drawing together with the purpose; the more detail the better.
- Step 2, printability check — wall thickness, overhangs, deep cavities and threads are reviewed, and any drawing changes are raised before production.
- Step 3, agree process and material — confirm SLS / MJF / SLA / SLM / FDM according to the application, plus the material grade.
- Step 4, quote and confirm — settle price, lead time and the scope of finishing before placing the order.
- Step 5, schedule and print — the part is built on the agreed process; powder-bed nylon is typically out in 1–2 days.
- Step 6, finishing and inspection — sanding, bead blasting, dyeing and painting, with the critical dimensions checked.
- Step 7, dispatch — packed and shipped, with prototype records or inspection reports attached where requested.
Of the seven steps, the first four are confirmation and the last three are execution. The problems, when they come, are almost always in the first four.
3. Where each step goes wrong
- Step 1 — sending files without stating the purpose. The part then tends to be made the cheapest possible way, which may not match your application at all.
- Step 2 — broken faces and a non-watertight STL cause slicing problems, so check the export before sending.
- Step 3 — if the application is not clear, the wrong process wastes money; an appearance part made in a process with visible layer lines is the usual example.
- Step 4 — confirm up front whether finishing is inside the quote, rather than discovering an extra charge at dispatch.
- Step 6 — mark the critical mating dimensions in advance, so that inspection has something to check against.
- Step 7 — for parts with an assembly relationship, ship them from the same batch so that batch variation does not stop them fitting.
4. How to judge a supplier’s prototyping capability
Getting a prototype right first time tests a supplier’s engineering judgement, not only its equipment.
- Look at the drawing feedback — can they flag wall thickness, powder clearing and tolerance issues before production rather than after?
- Look at the process range — a single-process supplier often has to pass a specified process or a companion operation on to someone else.
- Look at finishing capability — whether sanding, bead blasting and dyeing are in-house or outsourced directly affects lead time and consistency.
- Look at the lead-time commitment — will they put the date in the order?
- Look at response speed — how long a drawing revision takes to come back tends to mirror how the production line actually responds.
5. Primofort’s prototyping and delivery capability
Primofort covers SLS / MJF powder-bed nylon, SLA, SLM metal, FDM and full-colour PolyJet, with CNC machining, silicone vacuum casting and surface treatment alongside. Standard prototypes take 1–2 days and small-to-mid batches 3–5 days, with STL / STEP / IGS accepted. Files are met with a printability check first, the process route and lead time are given together before work starts, and there is a route for mid-job changes. Customers in the Pearl River Delta can deal with us locally, and drawings are accepted from anywhere in China.
Conclusion
For a first prototype, simply send the drawing (STL, STEP or IGS are all fine) together with what the part is for, and the rest follows the process. If you have particular requirements — a specified material, a specified process, or an inspection report — mention them when you send the files.